Glade Reference
Toggles the display of the LSW.
Toggles the display of the Output message window. The Output message window can be used for entering Python commands and displays messages from Glade. All messages in the Output window are written to the log file, called glade.log.
Toggles the display of the library browser.

Use the library browser to open cellviews, rename cellviews, copy cellviews or delete cellviews. The library browser shows the library name(s), the cell names and their view names as a tree. The library browser has several menu commands:
Library->Refresh - Refreshes the library browser display.
Library->New Lib - Creates a new library.
Library->Open Lib - Opens a library.
Library->Save Lib As... - Saves a library to disk.
Library->Exit - exits the library browser and closes the window.
You can interact with the library browser using the left and right mouse buttons as follows:
If you double click over the view name of a cell, that cellview is opened.
If you click over the name of a library, a popup menu is displayed that allows you to do the following:
If you click over the cell name of a cell, a popup menu is displayed that allows you to do the following:
If you click over the view name of a cell, a popup menu is displayed that allows you to do the following:
To find a cell in the library browser, use the Edit->Find... menu command to locate a cell by name. Alternatively, pressing an alphabetic key will take you to the first cell beginning with that character.
Displays the current edit cell's hierarchy in the hierarchy browser dock window.
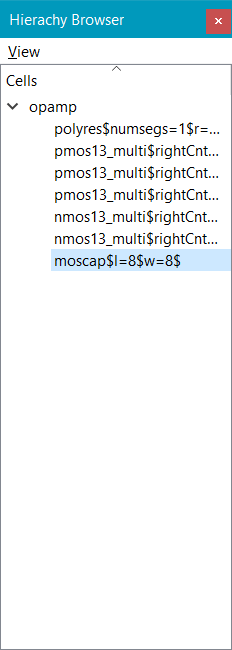
The hierarchy browser shows the design hierarchy. The root cell is shown with its subcells displayed by their cell names.
In addition to expanding the list items by clicking on the '+' boxes, several other operations can be performed.
Left mouse double clicking on any cell name will descend into that cell and it will be displayed in the browser as the new root cell.
Right mouse clicking on any subcell name will show that instance's properties (and hence the instance name).
Right mouse clicking on the root cell name will show a popup menu allowing:
Displays the current cell's nets in the net browser dock window. The cell name is shown as the root with its nets displayed.
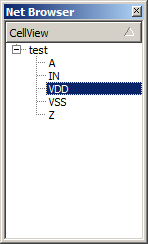
Left mouse clicking on a net will expand the net's subnets, if the net has subnets (e.g. if the design is from reading DSPF).
Right mouse button clicking on a net name will display a popup menu that allows you to do the following:


The Net Browser Options menu allows choosing:

Adds a marker at a specified location. The marker colour can be changed by the Marker Colour button, which displays the current marker colour. Marker size sets the size of the marker in pixels, so the marker size remains unchanged with zoom in/out operations. Line Width sets the linewidth; a line width of 0 or 1 is a single pixel line. Finally the Marker Coordinates are the XY location of the marker in microns.
Markers are useful for setting temporary reference points in layout. Like rulers, they are not persistent i.e. they are not stored in any output format.
Clears all markers.
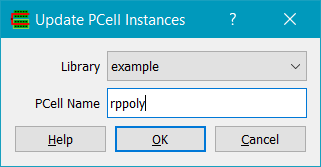
Updates the named PCell and all its instances in a library. This should be done if the PCell code is changed, as PCell masters and submasters are not evaluated at runtime.
Opens the Netlist View window. This is a dock window to display a Spice/CDL netlist for netlist driven layout
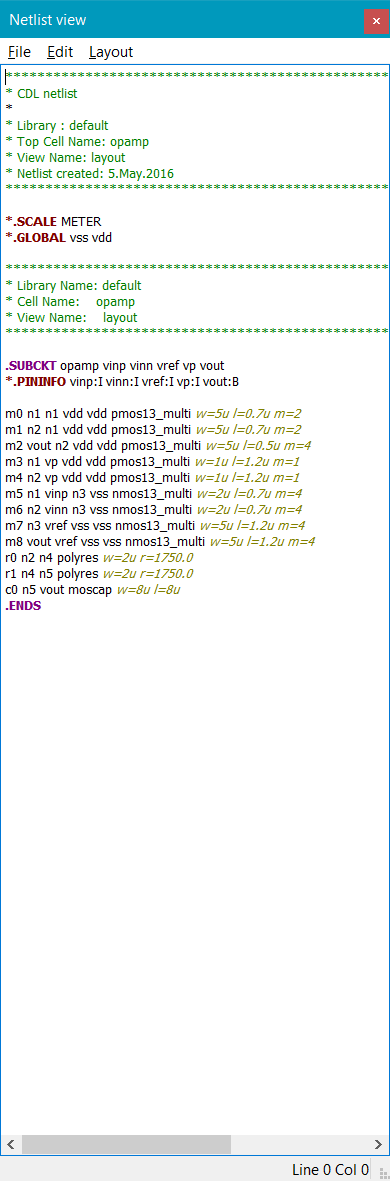
Loads a Spice or CDL file. The file is displayed in the Netlist View window with syntax highlighting.
Saves the current open file.
Saves the current open file to a (new) file.
Closes the current open file.
Undoes an edit.
Redoes an undone edit.
Cuts the selected text.
Copies the selected text to the clipboard.
Pastes the text from the clipboard to the current cursor location.
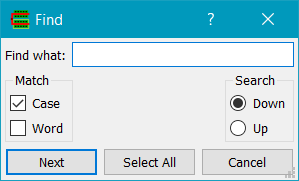
Finds the specified text.
Moves the cursor to the specified line number.
Displays the Map dialog.
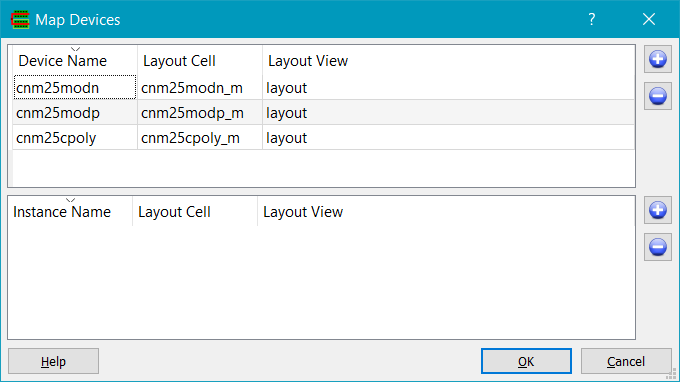
The top level table widget shows the device names found in the netlist in the first column. The
second and third column contain the cellName and viewName of the cellView to map this device to
in the layout. The lower level table widget shows the instance names found in the netlist in the
first column. The second and third column contain the cellName and viewName of the cellView to
map this instance to in the layout. Instance name mapping overrides device name mapping.
Device mapping defaults can be set in the techfile. For example,
MAP nch TO nmos13_multi layout ;
Maps the netlist device name to the layout cellView 'nmos13_multi layout'.
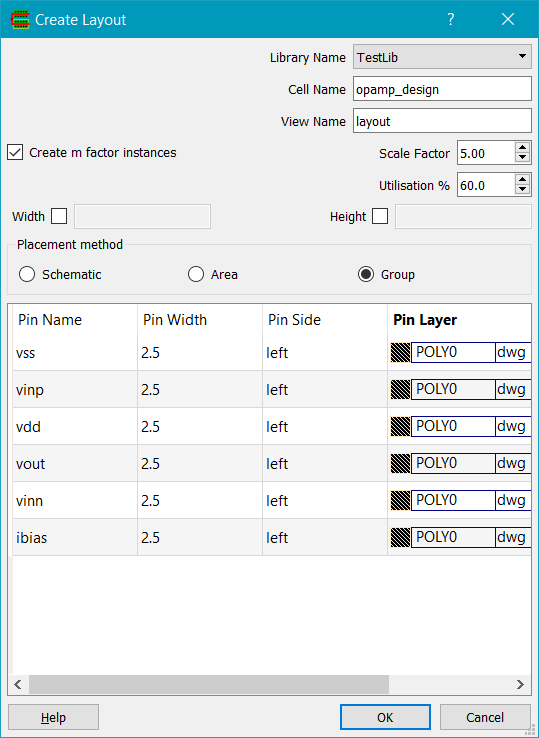
The target cellView is specified using the Library Name / Cell Name / View Name fields. If Create m factor instances is set, then if a netlist instance has a property 'm', then multiple instances of the cell will be created in the layout based on the value of the property, and the m property is not passed to the layout PCell. If not checked, the m property is passed to the layout pcell, if the pcell is required to handle this itself.
Scale Factor is not used when generating layout from a netlist.
Utilisation is used to create the cell boundary layer in the resulting layout view. The area of all the layout instances is summed, and divided by 100/utilisation%. If Width is specified, the cell boundary will be rectangular with the specified width, and height will be computed from the area/width. If Height is specified, the cell boundary rectangle will have the specified height and the width will be computed from the area/height. If both Width and Height are specified, then the cell boundary rectangle will use the specified width and height.
Placement method can only be Area when generating layout from a netlist. Area arranges the layout cells by type (PMOS/NMOS/resistor/capacitor).
The pin field allows pin width, side and layer to be specified for each pin. Pins are placed abutting the cell boundary rectangle according to their side.
Clears existing netlist/layout hilites.
Copyright © Peardrop Design 2026.